
Even though each of our 50+ patterns use different stitch combinations to render different motifs . . .
. . . there are a few tips we find ourselves sharing again and again in pattern how-to guides.
These are our little but essential stitch helpers. Read on, and see if you already know these tips.
The FLY stitch is a versatile one that looks different, depending upon how you render it. You can vary the width and depth of the three stitching points and you’ll get differing looks.
Leaving it loose gives you scallops, and pulling it tight gives you a “V” shape.

On Tea Party, you’ll keep the FLY stitch loose and use it for scallops around the outer doily-styled edge of the design.
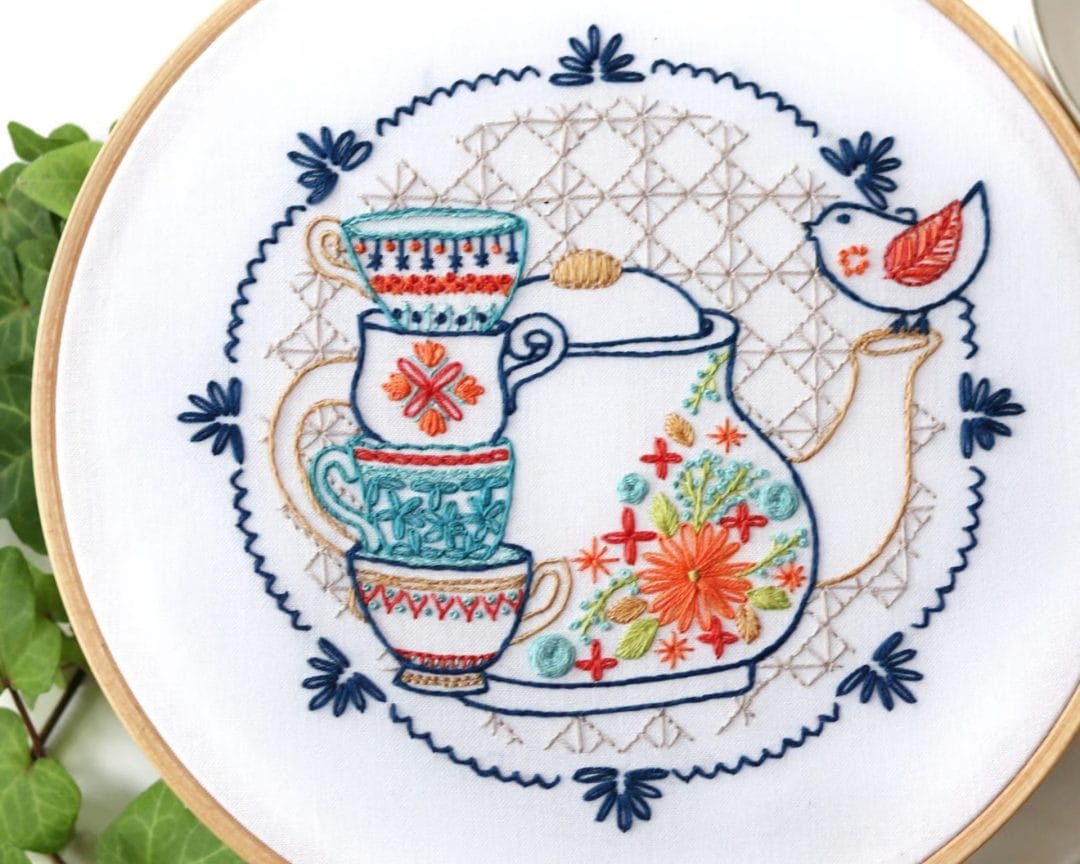
Then, pull it tighter and use a long stitch at the center stitch point to get a “Y” shape. See it for the series of coral “Y” shapes along the top of the bottom-most teacup.
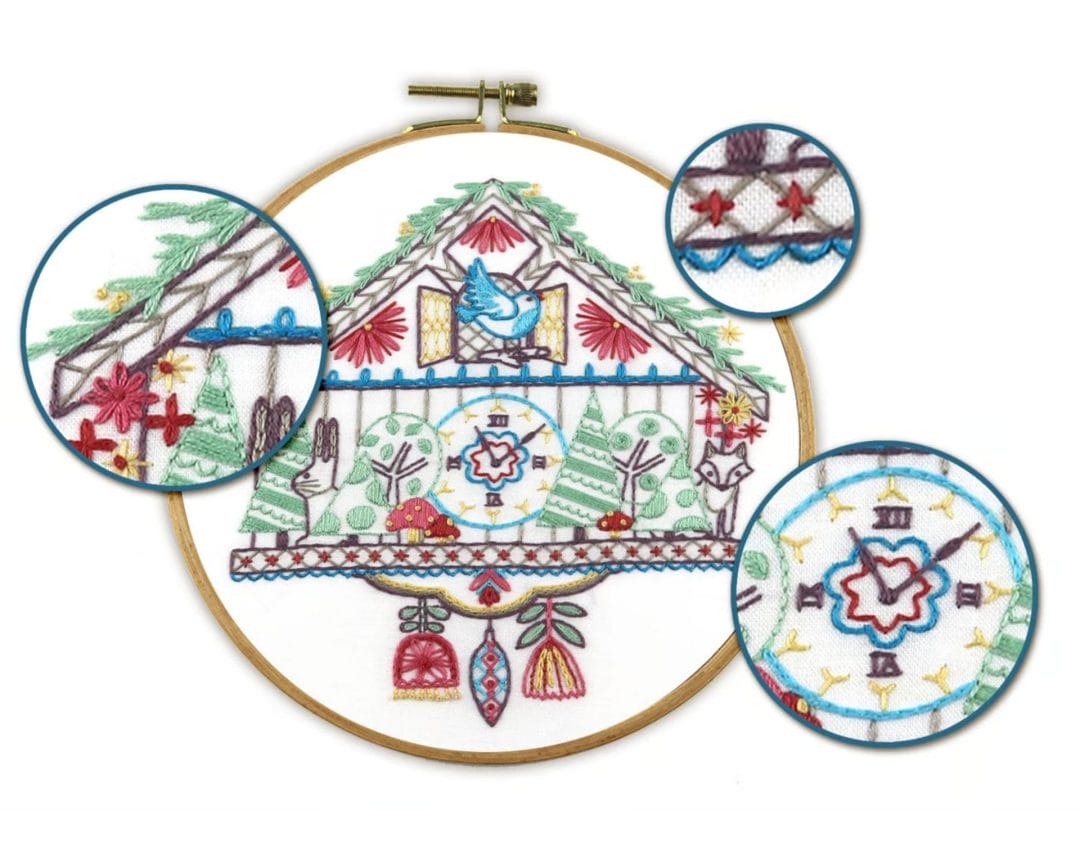
The FLY stitch is used in several spots on Cuckoo Clock. Nested brown “Y” shapes fill the clock’s eaves.
Blue scallops made with a loose fly stitch and a short anchor stitch run horizontally below the clock.
“Y” shaped ticks on the clock are also made with the FLY stitch.
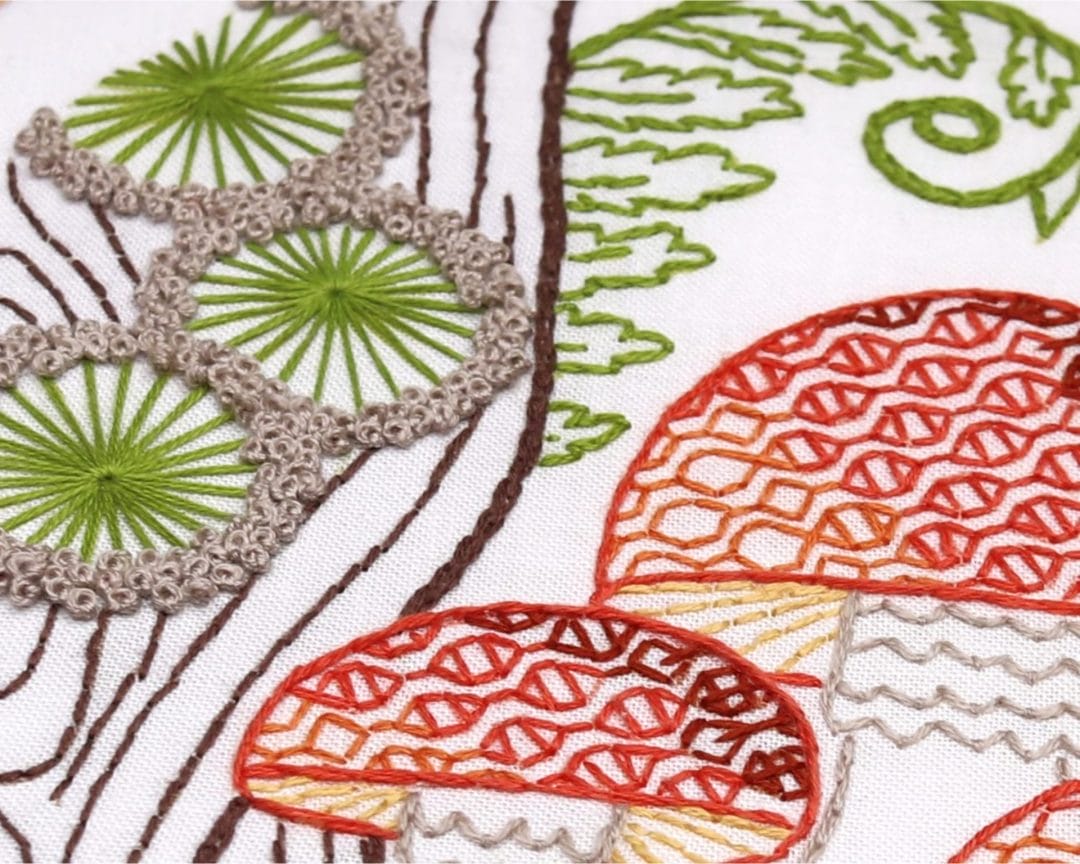
When you’re working bursts that have several rays, stitch from the outer edge of a ray into the center of it. Be sure to work adjacent rays in order–one after another (vs stitching rays across from each other or in random order). This way you’ll get a nice eyelet hold opening in the center.
Try this on the green fungi bursts in Mushrooms. Once you’ve got your rays and eyelets, add bulky French knots around the edges.
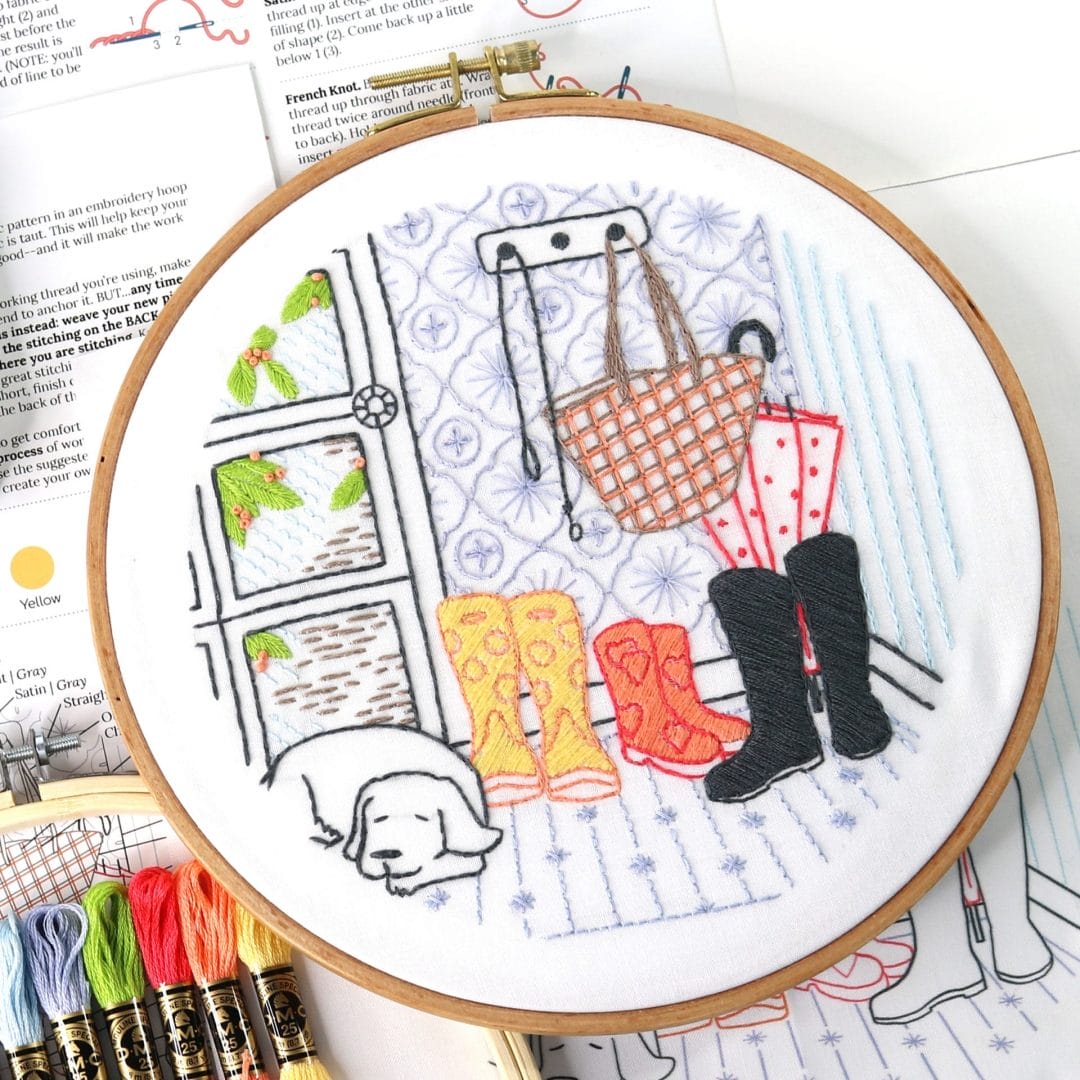
Rainy Day gives you a mudroom with a medallion-ornament wallpaper. The bursts in the center of each medallion have a burst you can stitch with a perfect eyelet-hole center.
When you’re outlining a shape with lots of curves, the OUTLINE stitch isn’t your best choice.
The WHIPPED BACK stitch is better for getting a super smooth line. You’ll go over the shape first with BACK stitch. Then go back over it with “whipping” that wraps around each existing stitch.

See it here on To The Woods to render the curvy oversized blossoms on the van. The red and purple and orange lines have all been stitched with the WHIPPED BACK stitch.

The SPLIT stitch is also great for tight and curving lines.
For this, you’ll be using a stitch much like the BACK stitch . . . except for one change:
instead of going down into the fabric just before the previous stitch, you’ll instead go right THROUGH the previous stitch, thus splitting it.

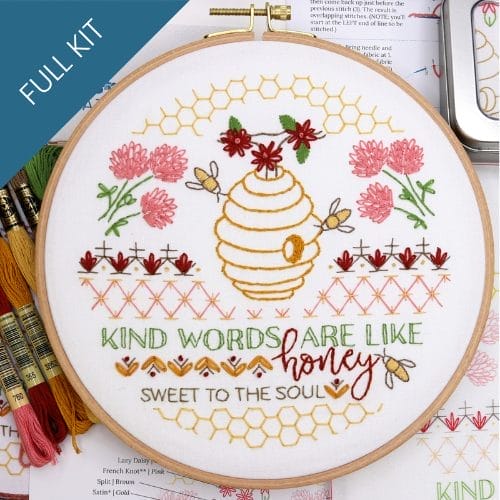
The SPLIT stitch is used on Honeybee Sampler for the stacked curves on the beehive.

When you’re deciding what to stitch first and then second and then third, take a look at stitches that sit closely — or that are even layered on top of each other.
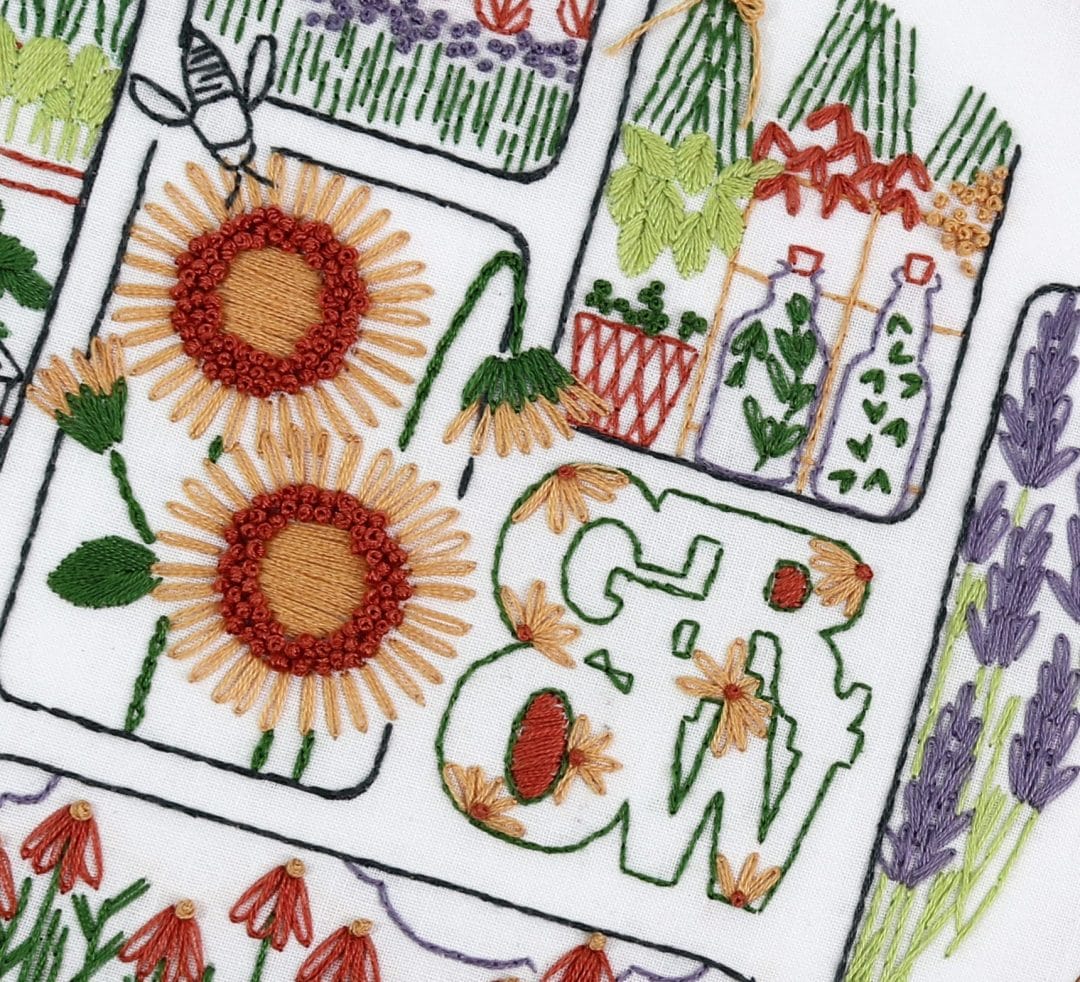
The sunflowers on Grow are a great example of this. You’ll want to render the SATIN stitched centers and the LAZY-DAISY stitched petals before you stitch the rust-colored bulky FRENCH KNOTS that layer over these.
AND . . . the smaller blossoms layer over neighboring blocks that will need to be stitched first.
Several of the filled circles on Tree of Life have layered stitches, and order definitely matters.
The circle at the bottom of the tree trunk has light blue horizontal and vertical lines that must be stitched first. Next come darker green diagonals. Finally, add light green + stitches to anchor the diagonals.

Several of the patterns in HeartFilled also used fun multi-color layers.

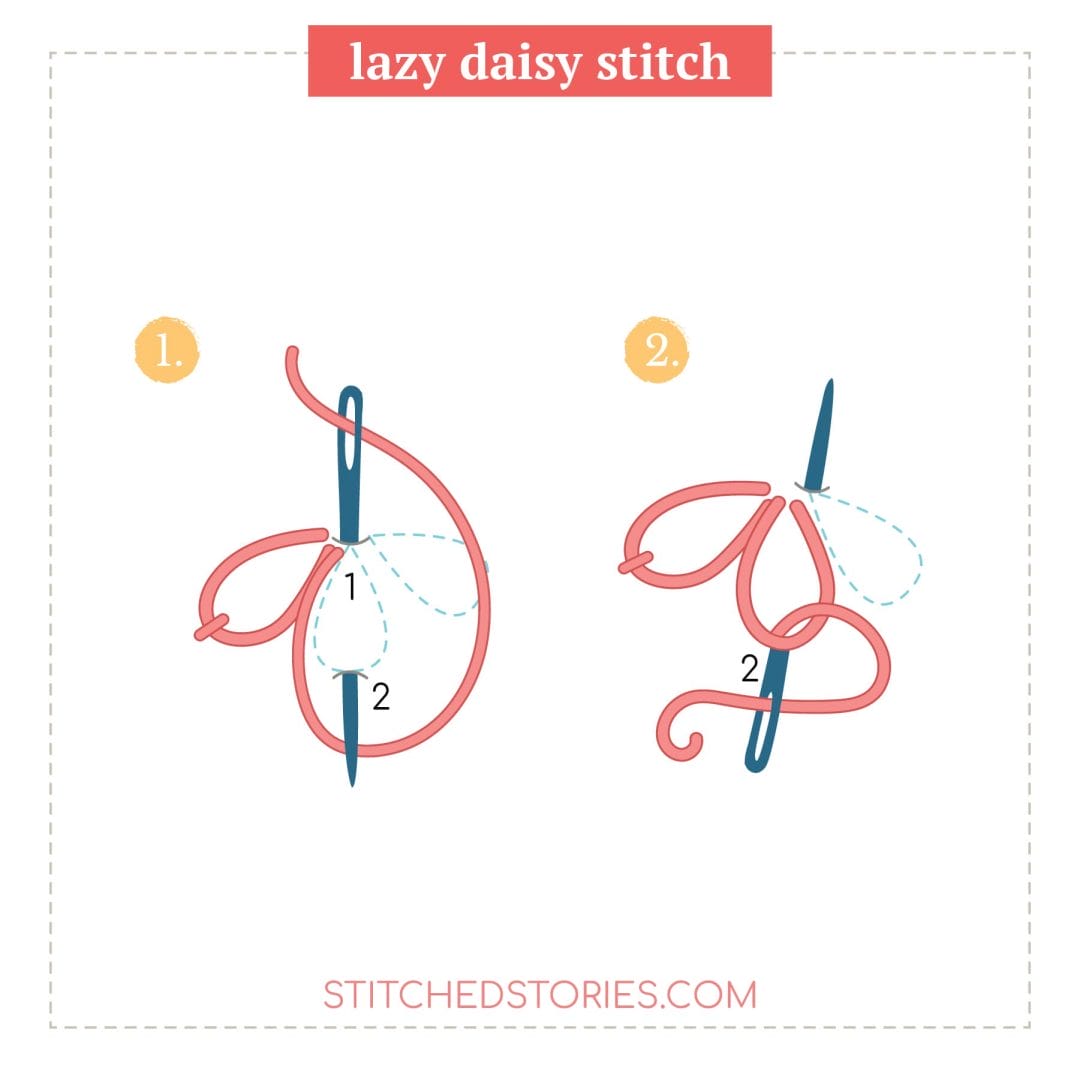
When you need to push the easy button, you can substitute two STRAIGHT stitches for a LAZY DAISY.

See the background of four-petaled blossoms surrounding the squirrel on Fall Squirrel Sampler. They were stitched with this shortcut–though LAZY DAISIES could have been used if preferred.

See on Quiltin’ Cowgirl, that there are three patchwork spots filled with light blue “+” shapes that could have been stitched with either the LAZY DAISY or a double STRAIGHT stitch shortcut.

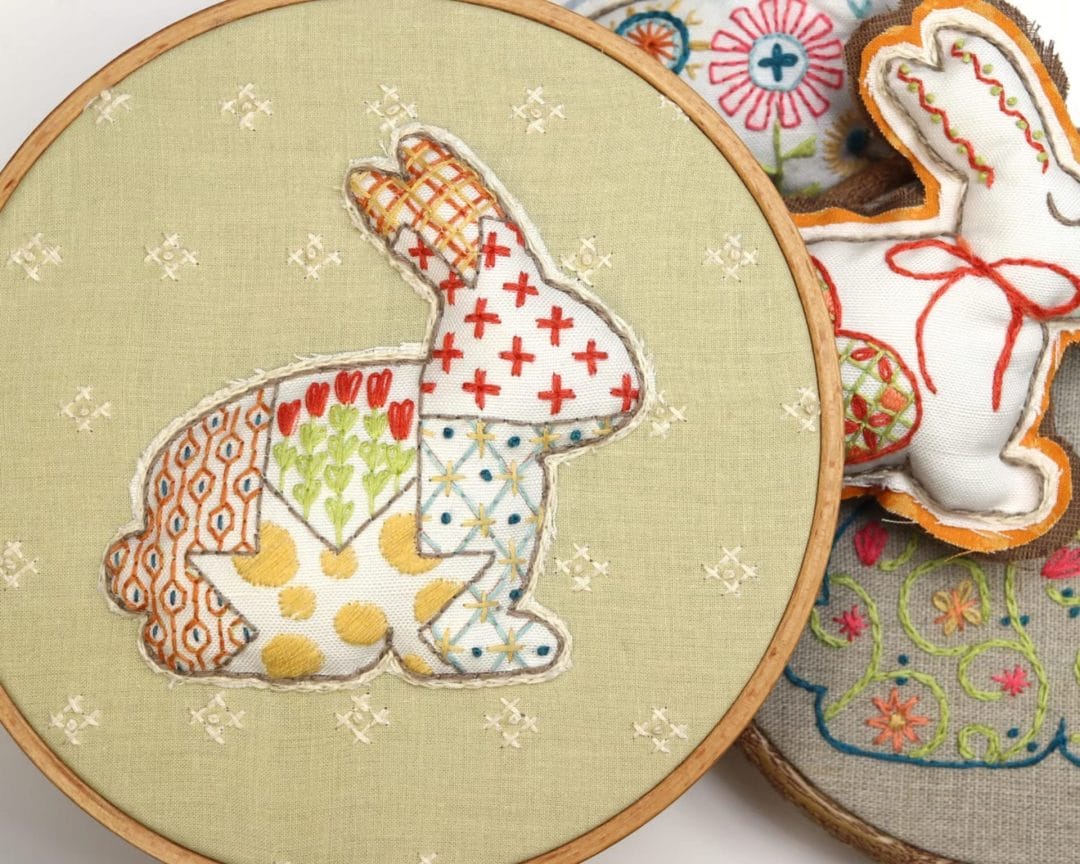
One more spot where I’ve used this shortcut is on the pattern filling the bunny head in this appliqued project from the Bunnies set.
As you fill a space, decide on the angle of your lines and then make a first stitch at shape center to establish this line. Make a few more stitches on either side of the first–about 1/4” apart, carefully repeating the angle you’ve established. Now filling in between the lines at the same angle is easier!
On Moths, you’ll use SATIN stitching to fill the dark gray areas of the tiger moth. There are also several spots filled with yellow and green. As you fill, be sure to “find your line” and establish it with your first stitch.

The SATIN stitched areas on Sit a While are smaller but also benefit from a strong line that’s echoed consistently in other like shapes. See it in the small blue circles on the chair and in the ovals on the carpet.

When you purchase a Stitched Stories kit or pattern, you’ll always get a detailed guide to the stitches and colors with extra tips like these. Click here to view all of our kits.
Embroidery that celebrates homey comforts...
Morning coffee, kind words, or slow napping afternoons, take your pick. These best-selling favorites are perfect for a kitchen nook, a thoughtful gift, and cozy handmade touches.